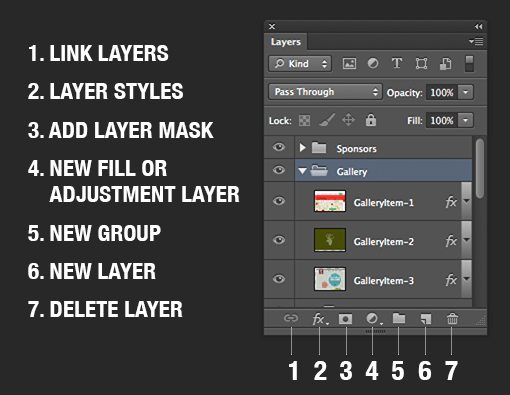
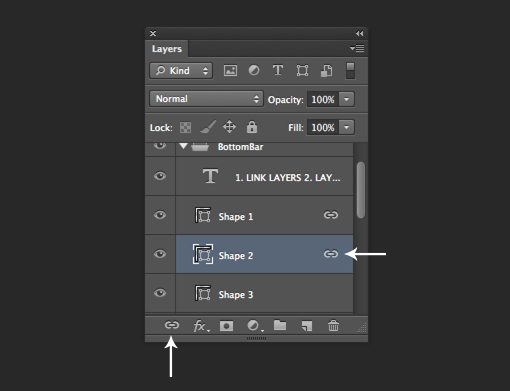
1. Link Layers
Allows you to move multiple layers every time you select any individual layer that is linked to others. In other words, it saves you the hassle of selecting multiple layers for conceptually connected content.
 2. Layer Styles
Drop shadow, bevel and emboss, stroke; these are examples of scalable, non-destructive styles and effects that can be added to a layer and continually tweaked with a live preview of the result. CS6 brings the ability to add styles to a group of layers (finally!).
 3. Add Layer Mask
Layer masks allow the user to specifically control the transparency of every single pixel within a layer. They can also be applied to groups of layers.
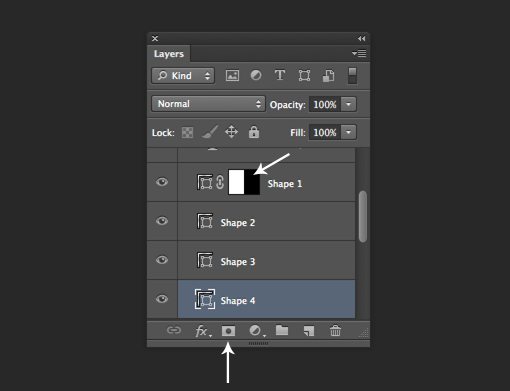 4. New Fill or Adjustment Layer
Adjustment layers are scalable, maskable, non-destructive layers that can be used to apply image adjustments such as Levels and Curves to the visible layers under them. Fill layers are pretty much what they sound like and can take the form of solid color, gradient or pattern.
 5. New Group
In addition to linking distinct but related layers, you can group them together in a folder. This allows you to easily select, move and manipulate the entire group of layers as a single unit while still maintaining individual layer editing abilities.
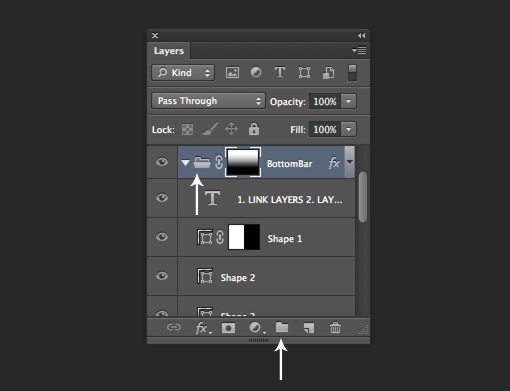
Masks
When working with masks in the Layers Panel, selecting specific things can get tricky. If you click on a layer or group to select it, you might accidentally select the mask instead. The difference is subtle but important.
If the mask is selected, whatever you do to that layer or group really affects the mask. So if you have a layer with a mask, and paint it black, you’ll paint the mask black if the mask is selected and the layer black if the mask isn’t selected.
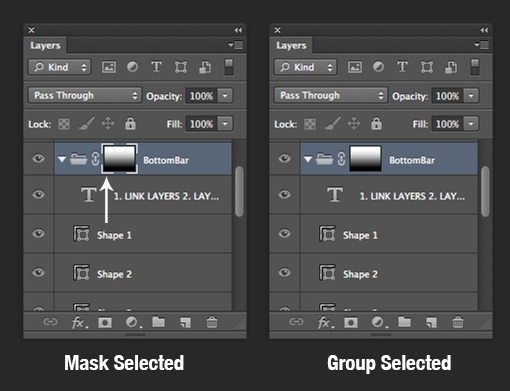
This selection also affects how the layer is moved, especially when the link between the mask and the layer or group is removed (click to remove):
Here, when I move the layer group around, I’ll actually be moving the mask, because that’s what is currently selected and the link between the two is absent.
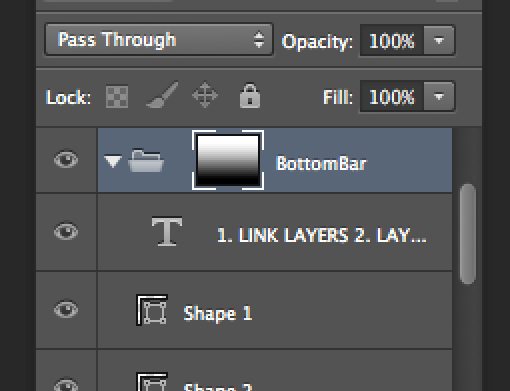
Layer Styles
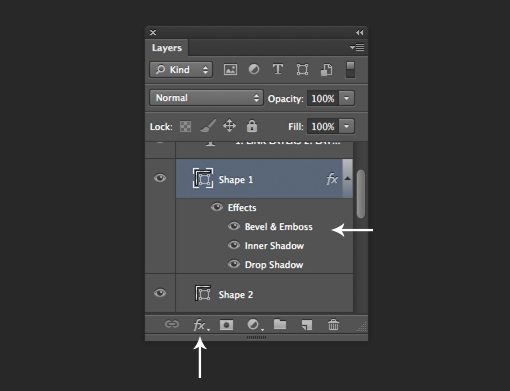
The other area that has hidden complexity is the little Layer Styles icon and drop down list that gets attached to each layer with styles applied. This is actually a highly functional little piece of UI.
For instance, do ditch the layer styles, you can drag the icon to the trash icon. Alternatively, you can expand the little drop down menu and drag specific styles to the trash individually.
If you’d like to move styles between layers, you can simply drag the little icon or the styles in the list.
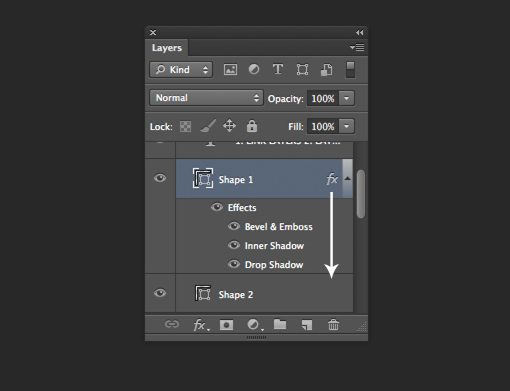
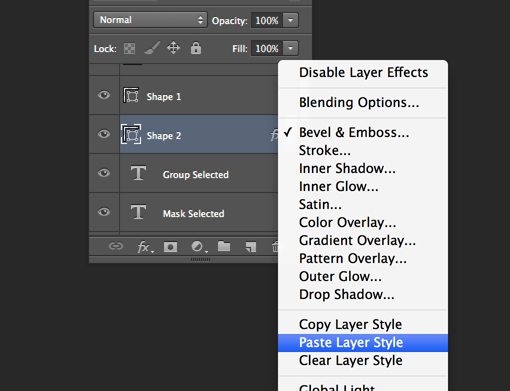
A Shift-drag will move the styles from one layer to another and an Option-drag will copy the styles from one layer to another. If you want to copy the styles from one layer to a bunch of others, right-click on the effects icon and go to “Copy Layer Style.” Then select the layers that you want to apply these styles to, right click and select “Paste Layer Style.”
Keyboard Shortcuts
There are a ton of great keyboard shortcuts here so let’s just make a few helpful lists. Some of these we mentioned in the last section, but they’re worth reiterating.
Layer Creation and Deletion
- New Layer: Command-Shift-N
- New Layer without Options: Command-Shift-Option-N
- Delete Layer: Delete
Layer Navigation & Organization
- Move Layer Up the Stack: Command-]
- Move Layer Down the Stack: Command-[
- Move Layer All the Way Up the Stack: Command-Shift-]
- Move Layer All the Way Down the Stack: Command-Shift-[
- Select All Layers: Command-Option-A
- Select Different Visible Layers: Option-[ and Option-] (Try adding shift)
Merging
- Merge Layers: Command-E (select two or more first)
- Merge Layers to New Layer: Command-Option-E (select two or more first)
- Merge Visibile: Command-Shift-E
- Merge All Visible to New Layer: Command-Shift-Option-E
Others
- Show/Hide Layers Panel: F7
- Duplicate Layer or Selection to New Layer: Command-J (Use Option for options)
- Turn Off All But Current Layer: Option-Click eye icon (repeat to turn back on)
- Active Selection from Layer: Command-Click on Layer Preview
- Create a Clipping Mask: Command-Option-G
Blending
The next section up includes the controls for blending layers together. These are comprised of layer blending modes as well as the opacity and fill sliders.

Layer blending modes are a crazy expansive topic and are far outside of the scope of this article. For more on them, check out this article.
Opacity vs. Fill
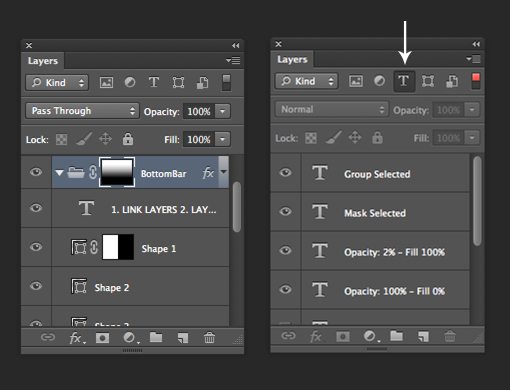
One of the most confusing parts about the entire Panel is the existence of both an Opacity setting and a Fill setting. After a cursory experimentation, you might conclude that they do the same thing, but this is definitely not true. Consider the follow example of a piece of text with various Layer Styles applied:
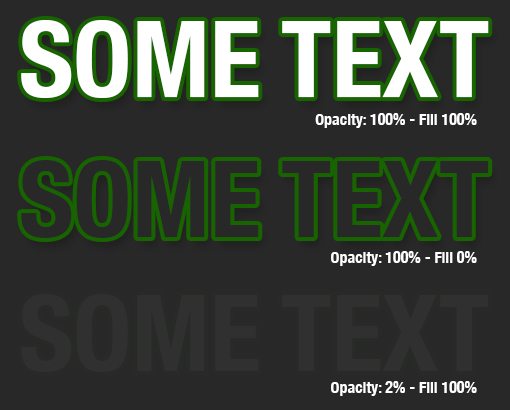
As you can see, when we reduce the layer’s Fill, the Layer Styles remain fully visible. However, when we reduce the layer’s Opacity, both the layer and its styles have lost visibility.
This is where just about everything that I’ve ever read on the difference between these two settings stops. However, in my own experimentation, I’ve discovered that the difference is more profound than that. Even without Layer Styles of any kind applied, Opacity and Fill can produce different effects.
Check out this example (from the aforementioned article), where I took a chunk of text, set it to Color Burn and reduced the Opacity and Fill separately to see how the two differ:
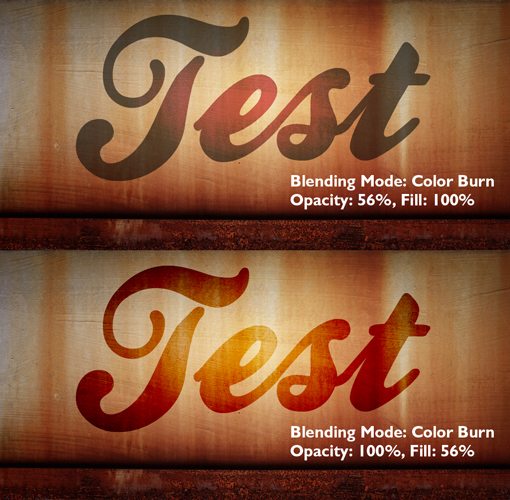
As you can see, when Blending Modes are thrown into the mix, the difference is profound. Reducing the Opacity produced a dull, flat look while reducing the Fill has created an interesting, more believable blend.
Keyboard Shortcuts
There are quite a few keyboard shortcuts to cover in this section as well. For starters, you should know that all of these shortcuts work specifically with the Move Tool (M) selected.
To adjust layer opacity, simply hit a number key. 1 = 10%, 2 = 20%, etc. Use 0 for 100% and 00 for 0% (CS6 only). Also, you can be more precise if you’re quick. For 23%, simply type 23 quickly. All of these shortcuts work for the Fill as well, you simply have to add the Shiftkey.
Amazingly enough, each Blending Mode also has its own keyboard shortcut. Let’s take a look.
- Shift-Minus (⇧-) or Shift-Plus (⇧+): Cycle Through Blending Modes
- Shift-Option-N: Normal
- Shift-Option-I: Dissolve
- ———————————
- Shift-Option-Q: Darken
- Shift-Option-R: Multiply
- Shift-Option-K: Color Burn
- Shift-Option-M: Linear Burn
- Shift-Option-B: Darker Color
- ———————————
- Shift-Option-A: Lighten
- Shift-Option-G: Screen
- Shift-Option-S: Color Dodge
- Shift-Option-D: Linear Dodge
- Shift-Option-W: Lighter Color
- ———————————
- Shift-Option-O: Overlay
- Shift-Option-F: Soft Light
- Shift-Option-H: Hard Light
- Shift-Option-V: Vivid Light
- Shift-Option-J: Linear Light
- Shift-Option-Z: Pin Light
- Shift-Option-L: Hard Mix
- ———————————
- Shift-Option-E: Difference
- Shift-Option-X: Exclusion
- None?: Subtract
- None?: Divide
- ———————————
- Shift-Option-U: Hue
- Shift-Option-T: Saturation
- Shift-Option-C: Color
- Shift-Option-Y: Luminosity
Locks
Our next section is where we control how layers are locked. I’ll wager that many readers only ever use one or two different lock styles but there are in fact four different ways to lock a layer, each of which is represented by an icon on the upper left of the Layers Panel.
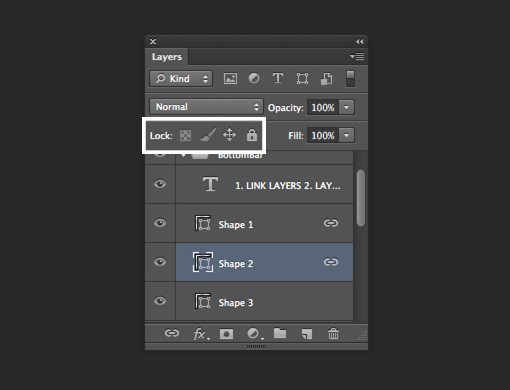
From left to right, these four different locks are as follows: lock transparent pixels, lock image pixels, lock position and lock all. Let’s have a look at each.
Lock Transparent Pixels
This is one of the coolest locks available, and sadly enough, it’s probably also one of the most looked over. Press this button with a layer selected and you essentially only allow the non-transparent pixels to be manipulated.
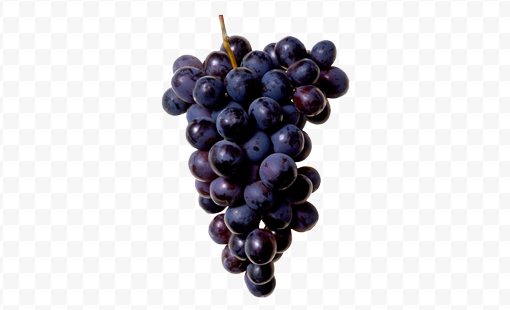
So let’s imagine that we have a layer containing some grapes that has been cut out and placed on a transparent background:
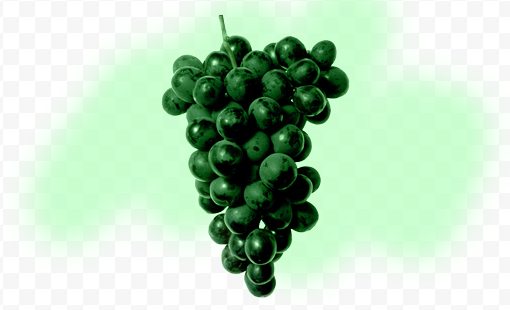
Now let’s say we wanted to grab our brush, and paint in some funny color but only over the grapes. We don’t want to “color outside the lines” so to speak and start adding color out in no man’s land like this:
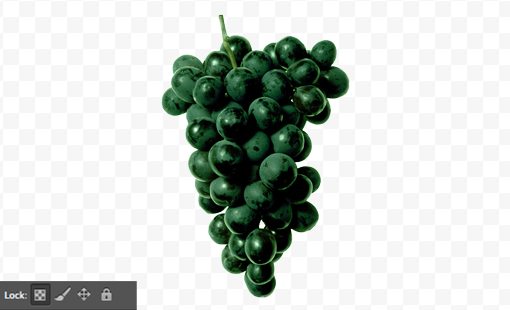
Instead, we want a clean look with only the grapes changing color. As with anything in Photoshop, there are a number of ways we could go about this, but one of the fastest and easiest methods is to click the “Lock Transparent Pixels” button. That’s it! Now we can paint all we want and neatly stay inside the lines.
Lock Image Pixels
By locking the image pixels, you’re preventing any pixel destruction via painting, blurring, sharpening, erasing or anything in that vein. This is good when you have a layer that you don’t want to screw up, but would still like to move around and resize it (both of these actions are still allowed).
Interestingly enough, Layer Styles, because they’re non-destructive, can still be applied and tweaked when the image pixels are locked.
Lock Position
This one is the opposite of the last one. You can jack with the layer’s appearance as much as you want, but moving and resizing are out.
Lock All
Lock All is exactly what you would think, it locks down a layer so tight that you almost can’t do anything with it: no painting, no moving, no Layer Styles; nothing. You can’t even delete it. Oddly enough though, you can still change its stacking order in the Layers Panel.
Keyboard Shortcuts
The only keyboard shortcut that I know of here is that you can press “/” to toggle the “Lock All” command. If you know of any others, leave a comment below.
Search
Adobe Photoshop CS6 brings the most significant addition to the Layers Panel in ages: searching. When you’re juggling twenty, fifty or even hundreds of layers in a single document, the document can become too cumbersome to manage effectively. Layer searching greatly improves this situation.
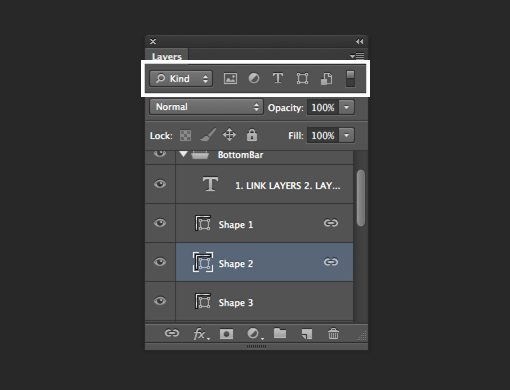
The default way to search/filter your layers is by “Kind,” which is extremely helpful. You’re presented with a row of icons that correspond to various layer types: pixel layers, adjustment layers, type layers, shape layers or smart objects. Clicking on one or more of these immediately filters out any layers that don’t match that criteria.
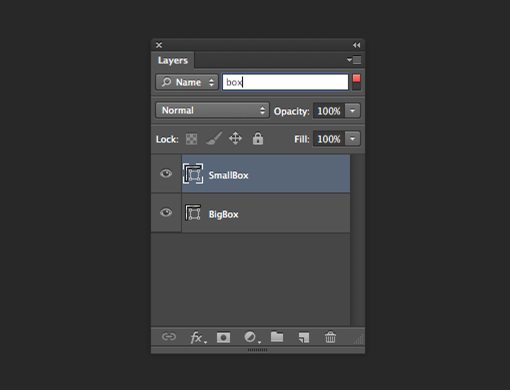
As you can see in the example above, we had a bunch of layers, then quickly drilled down to only the text layers. How cool is that? You can also filter by effect, mode, attribute and color or directly search for a layer by name.
To quickly turn off any filtering, just click the little switch at the top right of this section. Click it again to turn the filtering back on.
Panel Options
The sixth and final section that we’re going to go over is “Panel Options,” which is found in the little fly out menu at the top right of the panel. There are a lot of extra goodies in here, but they’re all straightforward so we’ll skip right to Panel Options.
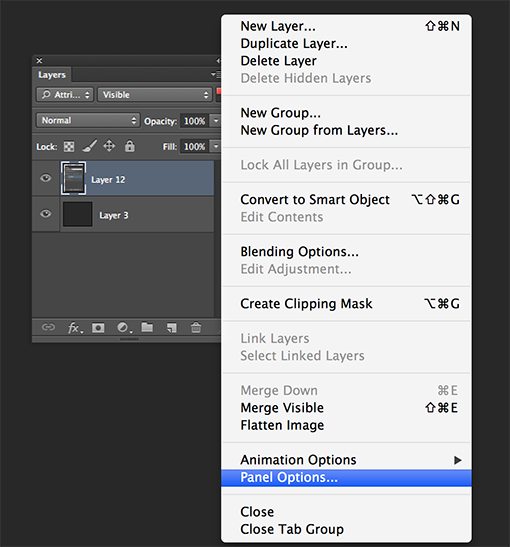
Clicking this will bring up the window below. Here you can choose your thumbnail size in addition to a few other tweaks. These may seem minor, but pay close attention, they can really make the Layers Panel a more enjoyable place.
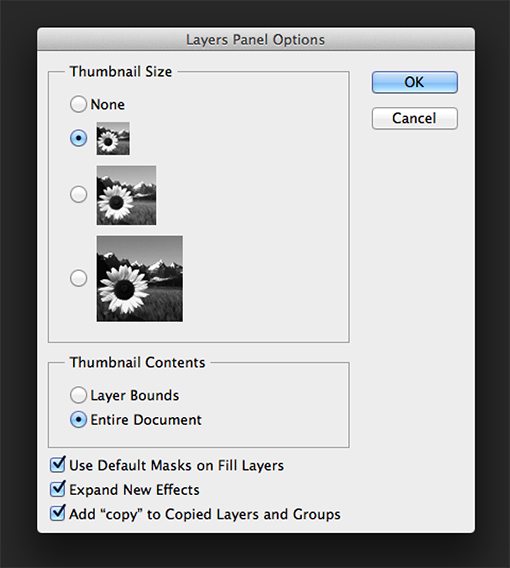
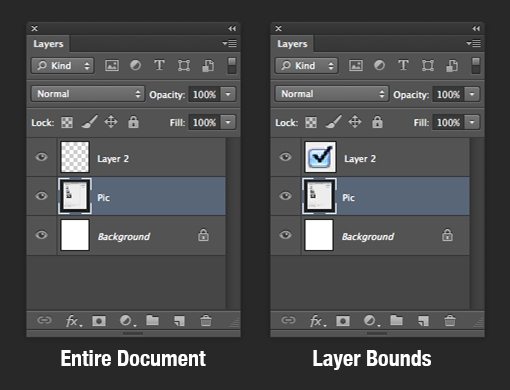
This shot shows the default options for the Layers Panel. I personally recommend considering a few tweaks. First, I like to change the “Thumbnail Contents” from “Entire Document” to “Layer Bounds.” This allows me to clearly see what each layer contains in the thumbnail preview, which is often not the case with “Entire Document” because it doesn’t effectively display small items. Here’s a comparison of the two with the same layers: